Do you have an aquarium at your home? Do you want to build an aquarium by yourself? Is your home aquarium leaking & needs a quick repair?
All these issues can be addressed with the help of a Silicone Sealant. If your home aquarium is leaking, then such an issue requires immediate attention & repair. If not repaired right away, it may cause further damage to fishes & affect the longevity of your aquarium.
It is also highly recommended to do yearly maintenance of your home aquarium to keep it intact. For routine aquarium maintenance, Silicone Sealant is used.
WHY USE SILICONE SEALANT FOR AQUARIUMS?
Silicone sealants stick one or two substrates together. It also creates an airtight & watertight seal.
Also, Silicone Sealants help in assembling & mounting glass structures and so they can maintain & keep the glass aquarium intact.
Applying silicone sealant to the aquarium will also prevent leakages.
WHICH SILICONE SEALANT TO USE FOR AQUARIUMS?
All silicone sealants are waterproof and bond with glass objects. In spite, of these similarities among silicone sealants, not every silicone sealant should be used for assembling or repairing aquariums. Using the wrong type of silicone sealant can kill your fish.
There are certainly important factors to be kept in mind while choosing a silicone sealant for aquariums.
Factors to keep in mind:
– The sealant should be made of 100% silicone.
– The Silicone Sealant should be free from harmful toxins. (Presence of toxins in the sealant can adversely affect fishes)
– Chosen silicone sealant should be efficient to hold onto the structure in constant water conditions.
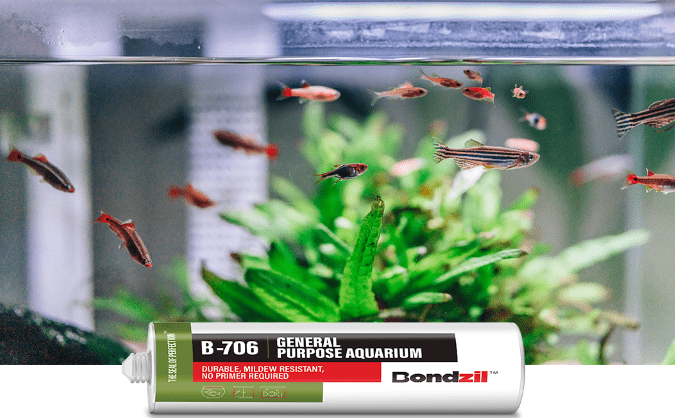
Keeping these 3 factors in mind. Silicone Sealant manufacturers provide special Aquarium Silicone Sealant.
The Aquarium Silicone Sealant is composed of 100% silicone. It is free of harmful toxins, adheres to glass efficiently, and retains the seal in adverse water conditions.
HOW TO REPAIR & MAINTAIN AN AQUARIUM USING SILICONE SEALANT?
Preparing Aquarium
1. Empty your Aquarium.
2. Shift the fishes into another pot for time being. [As repair is going take some time]
3. After emptying the aquarium check for the spots that need repair.
4. Mark the leakage spots using a marker that has washable ink.
5. Dry the aquarium from the inside & out using a cloth. Rub it across the glass aquarium gently.
6. Scarp off the existing silicone sealant from the glass surface using a razor or knife.
[Be careful while scrapping, don’t damage the glass in this process]
7. Check if all the surfaces are dried entirely. Do not apply silicone sealant while the surface is wet as it’ll be ineffective.
Preparing Silicone Sealant
1. Buy an Aquarium Silicone Sealant.
- Before fitting it into the sealant gun, pierce the nozzle of the sealant with a sharp object.
- Once the sealant is ready, fit it into the sealant application gun & it is ready to use.
Applying Silicone Sealant
1. Apply silicone sealant to the leaking areas.
2. Once it is semi-dry spread the sealant using a spatula.
3. Make sure that you use clear silicone sealant, to maintain the transparency of the aquarium.
- Let it dry for 24hrs after applying.
- After the sealant is cured, clean the aquarium using a detergent.
- Then fill in the tank slowly with water & check if all the leakage points are secured.
- . Then shift the fishes back to their aquarium.
HOW TO BUILD AN AQUARIUM USING SILICONE SEALANT?
If you are a home decor & fish enthusiast then you’d love to DIY a fish aquarium. We are not talking about simply assembling a few slabs of glass.
We are talking about a complete aquarium with rock, stones & plants. A full aquarium can be achieved by sourcing props and assembling them using Clear Aquarium Silicone Sealant.
Why use Clear Silicone Sealant?
It is because the beauty of the Aquarium lies in its transparency & clarity. To be able to see the props & fishes clearly. Thus, it is recommended to use Clear Silicone Sealant for building Aquariums. Clear Silicone Sealant helps in maintaining the aesthetic of an aquarium.
Why not use Adhesive instead of Silicone Sealant?
It is because adhesive takes more time to cure & is prominently noticeable & may make your Aquarium look ugly.
On the other hand, silicone sealant cures quickly & the seal produced is barely visible.
BUILDING AQUARIUM
-
Repurposing or Buying New Glass
You can buy a new slab of glass or can repurpose an existing glass. If you are choosing to reuse the existing glass make sure it is free from scratches.
While selecting the glass, make sure it has the right thickness for the aquarium. Before cutting the glass decide on the size of aquarium you want to construct.
Determining the size of the Aquarium:
The size of an aquarium is decided by 1 gallon of water per inch of fish.
For measuring the size of glass you’ll need a glass scorer, turpentine and a cotton ball, sandpaper, and safety glasses/gloves for good measure.
Clean the glass thoroughly before mounting the aquarium together.
-
Applying Silicone Sealant
Apply Aquarium Silicone Sealant around the edges & corners of glasses with the help of an application gun.
Then mount the glasses together from the end. If you are unable to spread silicone sealant evenly on the edge, spread it using a spatula.
Make sure that the silicone sealant is at 45 degrees angle to the surface while applying. This will help you produce a smooth seal easily.
Silicone sealant should be applied on the inner edge as well as outer edges in order to make the aquarium completely watertight.
After applying & assembling the aquarium let it dry for a day before starting with the inner decoration. -
Decorating Aquarium
Once the edges of the aquarium are cured & intact, start decorating the interiors.
Use only a bead of silicone sealant for attaching rocks & plants to the aquarium base.
Apply gentle pressure to stick stones, marbles & other artifacts into the aquarium.
Once all the props are attached at the base of the aquarium, give it another day to dry before filling water in it. -
It is ready
Start filling the aquarium with water slowly. If there are still some leaks. Identify the spots & apply the silicone sealant after drying.
If there are no leakages, fill the tank with water & transfer fishes inside.
KEY TAKEAWAYS
– Use only Aquarium Silicone Sealant for Aquarium repair & building
– Dry the aquarium before applying silicone sealant
– Transfer fish into the tank only after cleaning it thoroughly.
Now you know how to repair & build an aquarium, then what are you waiting for?
Go and DIY Aquarium Repairs. If you want an aquarium silicone sealant. Tap Here.